Pages

Tuesday 7 October 2014

A Quick Reminder!


Hi everyone out there in craft-land! We hope you are having a wonderful week, and for those of you fortunate enough to enjoy a long weekend, we hope you have stocked up on enough craft supplies to get you through until Tuesday

We are just sending all of our customers a quick reminder about our $5.00 clearance room that opens at 10am on Wednesday. This clearance room runs until the 18th of October from 10am - 2pm and, you guessed it!, everything in the room is $5.00 (yes, really!). 

Because of all of the excitement that is happening over the next two weeks, we will be postponing all of our daily scrapbooking and cardmaking classes (however, the Masterclass with Karen will still go ahead). Our classes will resume on the 21st of October

Likewise, we won't be having any weekly specials for the next two weeks while the clearance room is open, but you can expect them to start showing up again in your inbox after the room closes!   

Here's a quick recap of our email that we sent out yesterday outlining the three exciting offers for you to take advantage of this show season!


  1. Stage 1 - If you see us at the upcoming Craft & Quilt show you will get a free Clear Wink of Stella just for spending over $75 on one invoice.

  2. Stage 2 - You will then get your "Passport to Paradise", this means you can pop over to Photo Continental with your passport any time before the end of October, spend $100 in the craft room and we will refund your $18.00 Craft & Quilt entry (excludes sale items)

  3. Stage 3 - You loved the $5 stand we had at the June show now you can have a full shop of $5.00 items- that's over 40,000 items, bags of stuff, boxes of bits and more and every last thing is only $5.00. This one runs from the 8th of October until the 18th 10am-2pm and the sale room will be located on the upper floor as it's far too big to house anywhere else!

Tuesday 12 August 2014

Stencilling in Papercraft

I don't know about you, but I have a huge stash of stencils lying around at home that I don't get a lot of use out of. This is probably because I only use them in a few different ways, when, in reality there are many, many ways that you can use stencils to create different effects. On Saturday August 23rd, join our stencil specialist Julie to learn some new techniques, including using metallic stencil paste, glitter and foils to create very different effects. Each class is only $29.00 which includes all of the materials you need - plus you get to take home the sunflower stencil (which we sell here at Photo Continental for $13.50). In addition you will also get a 15% off voucher to spend on any of your full-price craft purchases on the day! You can book into Julie's class by in store, over the phone or online here.


Tuesday 1 July 2014

Photo Displays for Parties

When someone in my family is having a party, I love to display photos from their lives all over the house, so the guests can have something to entertain them. Sometimes I'll make a photo board out of a large canvas covered in pretty fabric. Sometimes I'll stretch out ribbon and peg the photos on. I always find it's a great conversation starter, and it makes the birthday boy or girl feel extra special (if not a bit embarrassed).

Here are some great ideas for displaying your photos for your next party!

Washi Tape Frames via 100 Layer Cake
Arranging photos into numbers via Martha Stewart
Arranging photos in Mason Jars via Camille Styles
A rustic photo display with doilies, pegs and twine via Emmeline Bride

Photo gemstone display via A Beautiful Mess
I hope you enjoyed this short round up!

Happy crafting!

Thursday 26 June 2014

Mood Boards

Lately I've been having some fun with monochromatic layouts and cards. I decided to whip up a couple of mood boards with two of my favourite tones at the moment: coral and seafoam. All of the products pictured here can be purchased in store at Photo Continental and most can be purchased online - just follow the links!

Coral Mood Board

Seafoam Mood Board
Products used (clockwise from left): Sophisticates Assorted Feathers // Doodlebug Round etc's Swimming Pool // Prima Something Blue Flowers Save the Date // Anna Griffin Carolina Puffy Fabric Sticker // Glass Pearl Teardrop Aqua // Eu De Nil 2M Crochet Trim // Versa Color Cube Mint // Versa Color Cube Seafoam // Eu De Nil Pinwheels // Liquid Pearls Mint // Bella Blvd Washi Tape // Tim Holtz Distress Glitter Tumbled Glass

Thursday 19 June 2014

Instant Photo Frenzy

I've been loving the instant photo / Polaroid trend in scrapbooking layouts lately. They give a little touch of whimsy and nostalgia to layouts, as well as the ability to include lots of smaller photos. I was playing around with the Jillibean Soup Smile Frames, which look like a Polaroid frame to create two very different layouts.

For my first layout, I was inspired by this page by Paige Evans that included grid-based watercoloured diecuts, journalling and matching embellishments to the diecuts by colour. I liked the idea that I could use a number of smaller photos, and found a number of photos from 2013 featuring my friends.


To make this layout, I watercolored the white Smile Frames using Faber Castell Gelatos, mixing them on my craft mat and then painting using a waterbrush. I used a lot of water to get a nice, thin wash over each square.


I distressed the edges of a handmade paper and layered it over a pink patterned piece of scrapbooking paper. I cropped pictures to fit in the frames, and adhered them to the back using double sided tape. The last frame was reserved for journalling on a piece of plain card. I then embellished each square with Prima flowers, Papermania embellishments, matching them to the colour of each frame.

For my second layout, I wanted to experiment with our new Prima wire thread. I wanted to make a personalised title that made an impact, so I decided to try out the lime green coloured thread and twist it into the word love. It was amazingly pliable, and I was pleased that the finished result actually looked like my handwriting!


This layout was quite simple, but the green elements in the page made a huge contrast against the black and the Kraft Smile Frames. I spritzed some white Dylusions spray behind the place where I wanted to place the frames before sticking them down, and then scattered the rest of the page with more Papermania embellishments and wood chips.


I wrapped the tail end of my word around a Papermania wooden bobbin... and I was done!

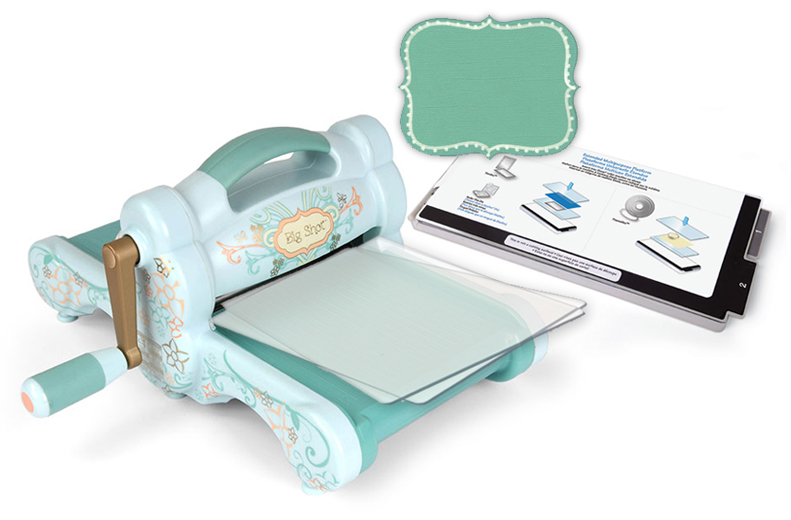
These pages were so fun to create, so I decided to buy the Couture Creations Polaroid frame die so that I could make my own instant photo frames out of different scrapbook papers.

Happy crafting!

- Heather

Tuesday 27 May 2014

Tim Holtz Distress Spritzer... Our favourite toy!

Right before we started our move to the bigger downstairs area, Teena gave us a fun little toy to play with. Have you had a play with the Tim Holtz Distress Spritzer yet?


It works like a little handheld airbrush machine. You simply slot your Distress Marker (or Tombo, or Copic Sketch) into the pen holder and turn the screw to hold it in place, then squeeze the barrel to blow puffs of air past the nib of the pen and onto your work surface.

I used it with one of the Tim Holtz doily stencils to create a blue, airbrushed background on some leftover card. Pretty easy, and for only $18.95, it's a relatively inexpensive way to get some extra use out of your distress markers!

Happy crafting!

- Heather

Tuesday 20 May 2014

De-Stashing

A couple of weeks ago, I "de-stashed". You hardcore crafters will know what I'm talking about. I went through my craft room and organized it, then tried to find a new home or a new purpose for the things I hadn't used in a while. I found waaaayyy too many stamp pads for someone who doesn't do a whole lot of stamping and a whole drawer full of half-used alphabet stickers and thicker sheets full of Q's and X's and Z's. Ugh.

Thankfully I didn't throw them out, because not long after, I stumbled upon this layout by Olatz that turns your unwanted thickers letters into a real piece of art! Awesome!


An excellent idea, no? Happy crafting!

- Heather

Splashes of Paint

This week until Saturday, all of our Tim Holtz Distress Paints are reduced from $6.95 to $3.95. While many of our Mixed Media art fanatics have been scooping them up, I like them for my scrapbooking layouts and art journalling. I found this gorgeous layout by Wilna Furstenberg using bold paint stripes to create a beautiful and colorful background that showcases her photos. Don't you love it?

http://cdn.studiocalico.com/gallery_pictures/images/000/241/780/large/image.jpg

If you haven't used them before, Distress Paints are very fluid, so they glide over paper when you apply them directly using the sponge applicator. They are also water-based and blend well with water while they're wet. Once they're dry, however they don't react with water, which means they're awesome to layer. They dry nice and flat and smooth, unlike some other acrylic paints which dry with a thick texture. 

So pop on in to Photo Continental and grab some while they're cheap! 

- Heather

Monday 19 May 2014

We're a little bit obsessed with...

Paper Flowers! Have you seen them floating around Pinterest and craft blogs lately? When I saw these gigantic beauties, created by artist Tiffani Turner, I was inspired to try my hand at paper flower making. Tiffani's flowers take from 38 - 80 hours to make, so I thought I would start with something a little smaller. I ended up using the new Spellbinders D-Lites Create-a-Flower die range.


They were extremely simple to use as they cut cleanly and then when I ran them through my Bigshot again, they embossed all of the detail right onto the die.


I then applied Brilliance & Versacolor ink onto the petals to create the gradients you see in real flowers, and then enhanced the final details with Copic pens and a yellow Aquacolor crayon.


I rolled up the stamens and dabbed some glue on the ends and dipped them in bright yellow Flower Soft to create the look of pollen.


I rolled the petals with a double-ended embossing tool, and then glued them all together. Finished! They were so easy to throw together, which meant that I got them done in an afternoon.


And how gorgeous are those butterflies? They come double layered, so I just inked the ends up and applied some Fairy Dust glitter on the tips of the wings. Love!


I hope you get inspired to try your hand at some paper crafting yourself!


 Enjoy!

- Heather

Wednesday 14 May 2014

Which to buy... A Sizzix Bigshot or a Provocraft Cuttlebug?

Well, you've decide to take the plunge and buy a die-cutting machine. But you have no idea which one to buy! You've noticed that the Bigshot and the Cuttlebug have large followings, but you don't know what the difference between the two is. You jump on the online discussion boards to try and glean some wisdom from other crafters, but it just leaves you feeling more confused! Here is our definitive guide to the pro's and con's of both machines, to help you make an easy and informed choice!

Sizzix Bigshot


Pro's:
  • Sturdy, makes "cranking" the dies and embossing folders through the machine a breeze
  • Can fit the newer, wider Sizzix dies
  • Comes with all of the plates that you need for basic die cutting and embossing
  • The cutting "sandwich" or "stack" is easy to remember as the combinations are printed on the spacer platform
  • Easier to cut different materials, such as fabric, felt and chipboard

Cons:
  • Large and heavy, making it difficult to transport 
  • Doesn't fold up, so it is difficult to pack away and store
  • Slightly more expensive than the Cuttlebug (retails for $149), but includes all of the needed plates

Cuttlebug


Pro's:
  • It folds up and is very lightweight making it the more portable machine
  • It is easier to pack away and store
  • Slightly less expensive than the Bigshot (retails for $129), although the machine doesn't include the plate needed to cut wafer thin dies (a C Plate)
Con's:
  • The fact that it is lightweight and has a retractable handle make it harder to "crank" dies and embossing folders through the machine
  • Some newer Sizzix dies are too wide to fit through the machine
  • You have to invest in a C Plate in order to cut wafer-thin dies, such as Spellbinders
  • The cutting "sandwich" or "stack" of the plates is harder to remember
  • Harder to cut different materials
In summary, the Bigshot is a better investment if you're looking for a machine that is easy to use, however a Cuttlebug is the winner if you want a machine that you can transport, or if you are short on space and need to store it away.

Hopefully this will make your decision a little easier!

- Heather